

Farcaster
Farcaster is a decentralized social protocol based on Optimism.
The project has raised $180 million from major funds such as a16zcrypto, Coinbase Ventures, and Multicoin Capital. In addition to top funds, the project has prominent active users, including Vitalik Buterin.
Essentially, it is a social network 3.0 where you won't have your account blocked. Since the protocol is based on blockchain technologies, users have full control over their data, audience, and the content they share. Importantly, data is not stored centrally but through a hub system that provides the appropriate level of information security without overloading the main network.
Launch of Farcaster Hubble
Official recommended requirements:
- 16 GB of RAM
- 4 CPU cores or vCPUs
- 160 GB of free storage (we recommend using a server with at least 240 GB)
Preparatory Steps
Before installing the Farcaster node, we need to complete a few actions:
1. Rent a virtual machine
2. Register an account on Warpcast (a client for working with the Farcaster protocol
3. Create API keys
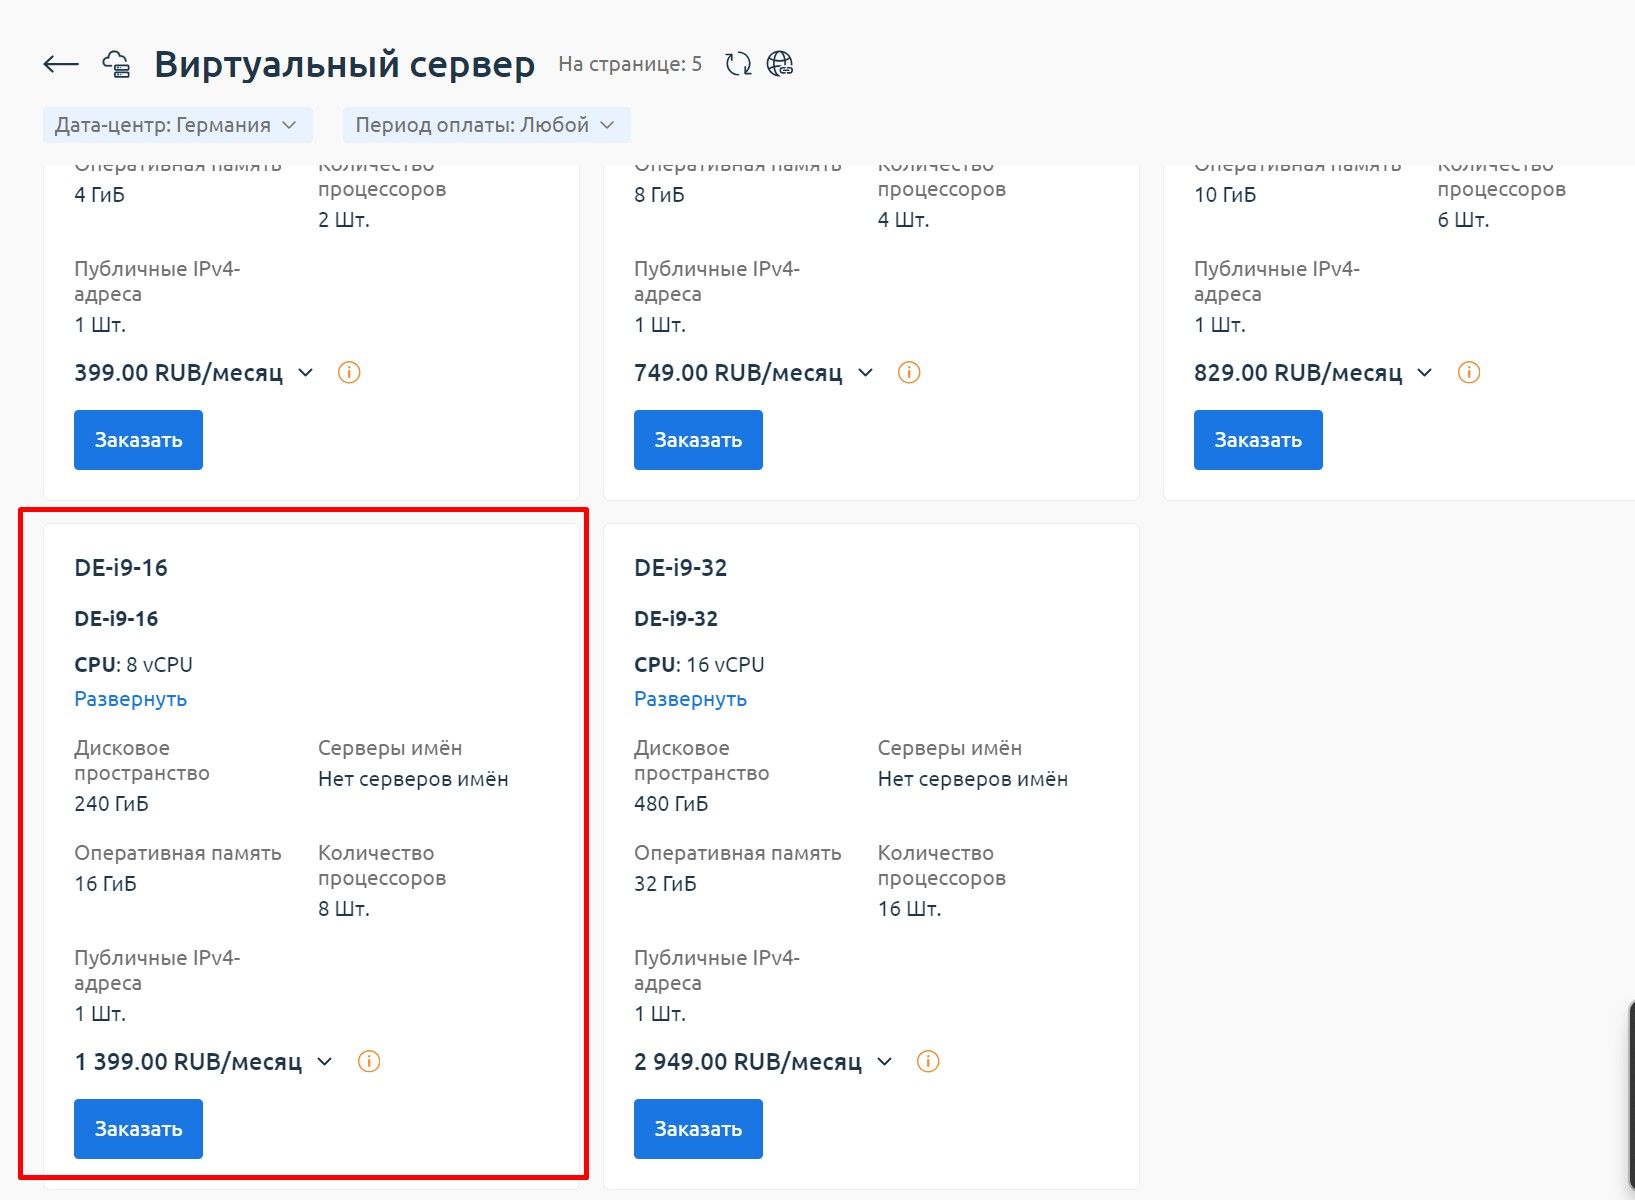
Server Rental
To install Farcaster Bubble, we rented a server on the Xorek.cloud platform. You can pay for services on this platform using either Russian rubles or cryptocurrency. For running the node, a server like the one shown in the screenshot below will be suitable:
Registering a Warpact Account
To register an account on Warpact, go to the website and complete the standard registration process.
Important: Account activation will cost the user $5.
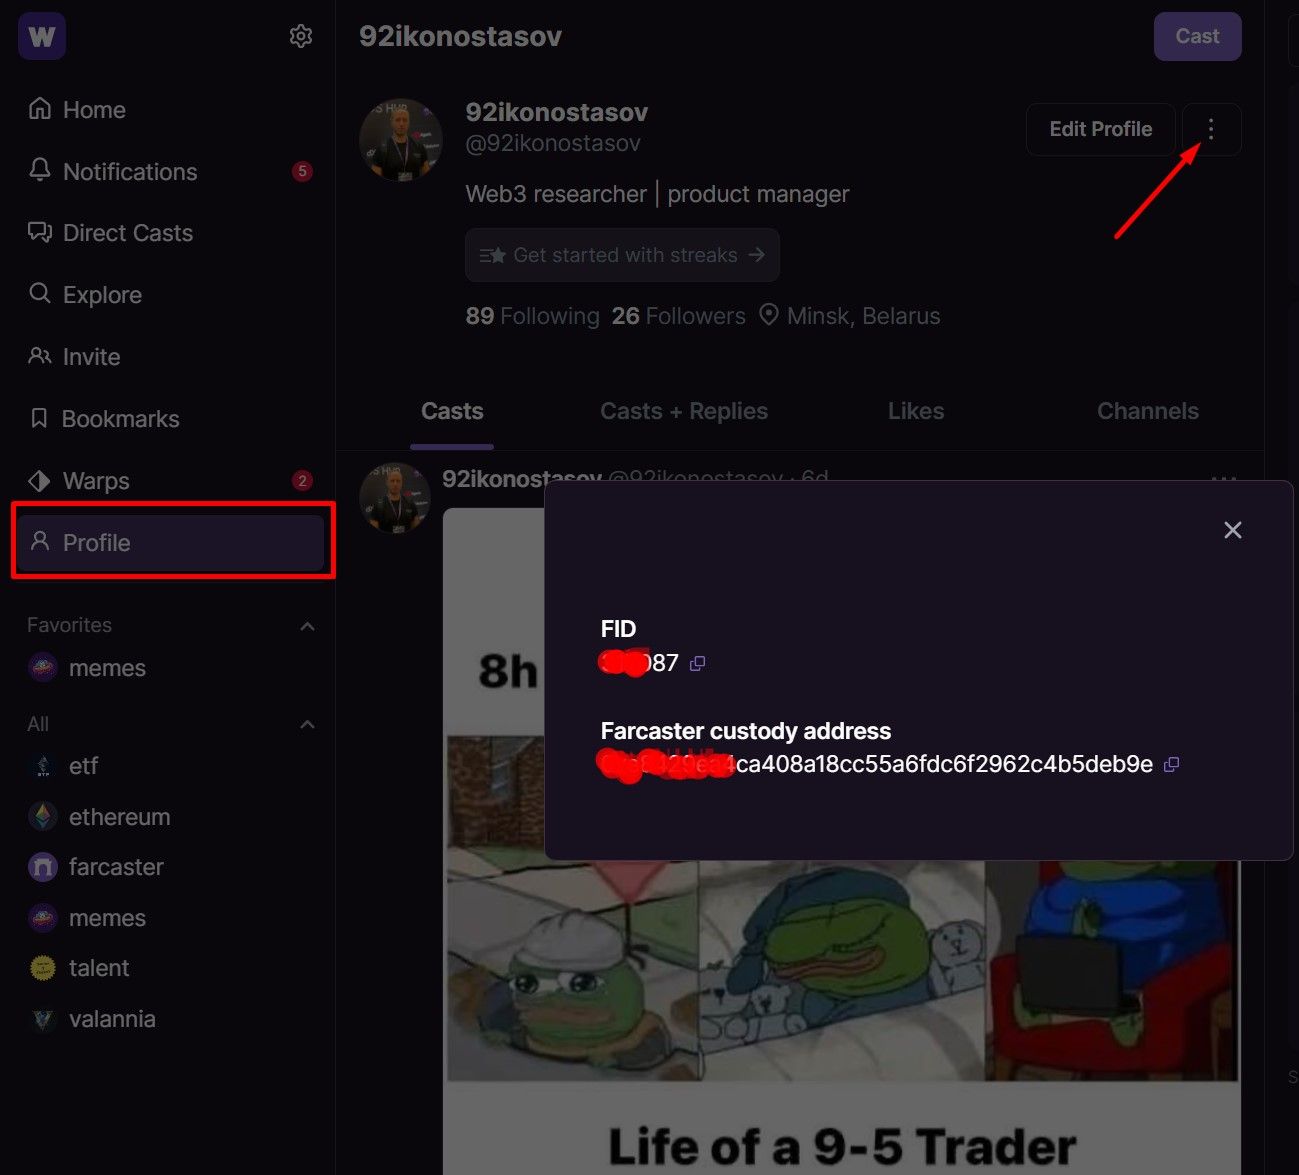
After creating an account, go to the Profile tab > click on ... > about > copy the FID and save it in a text file.
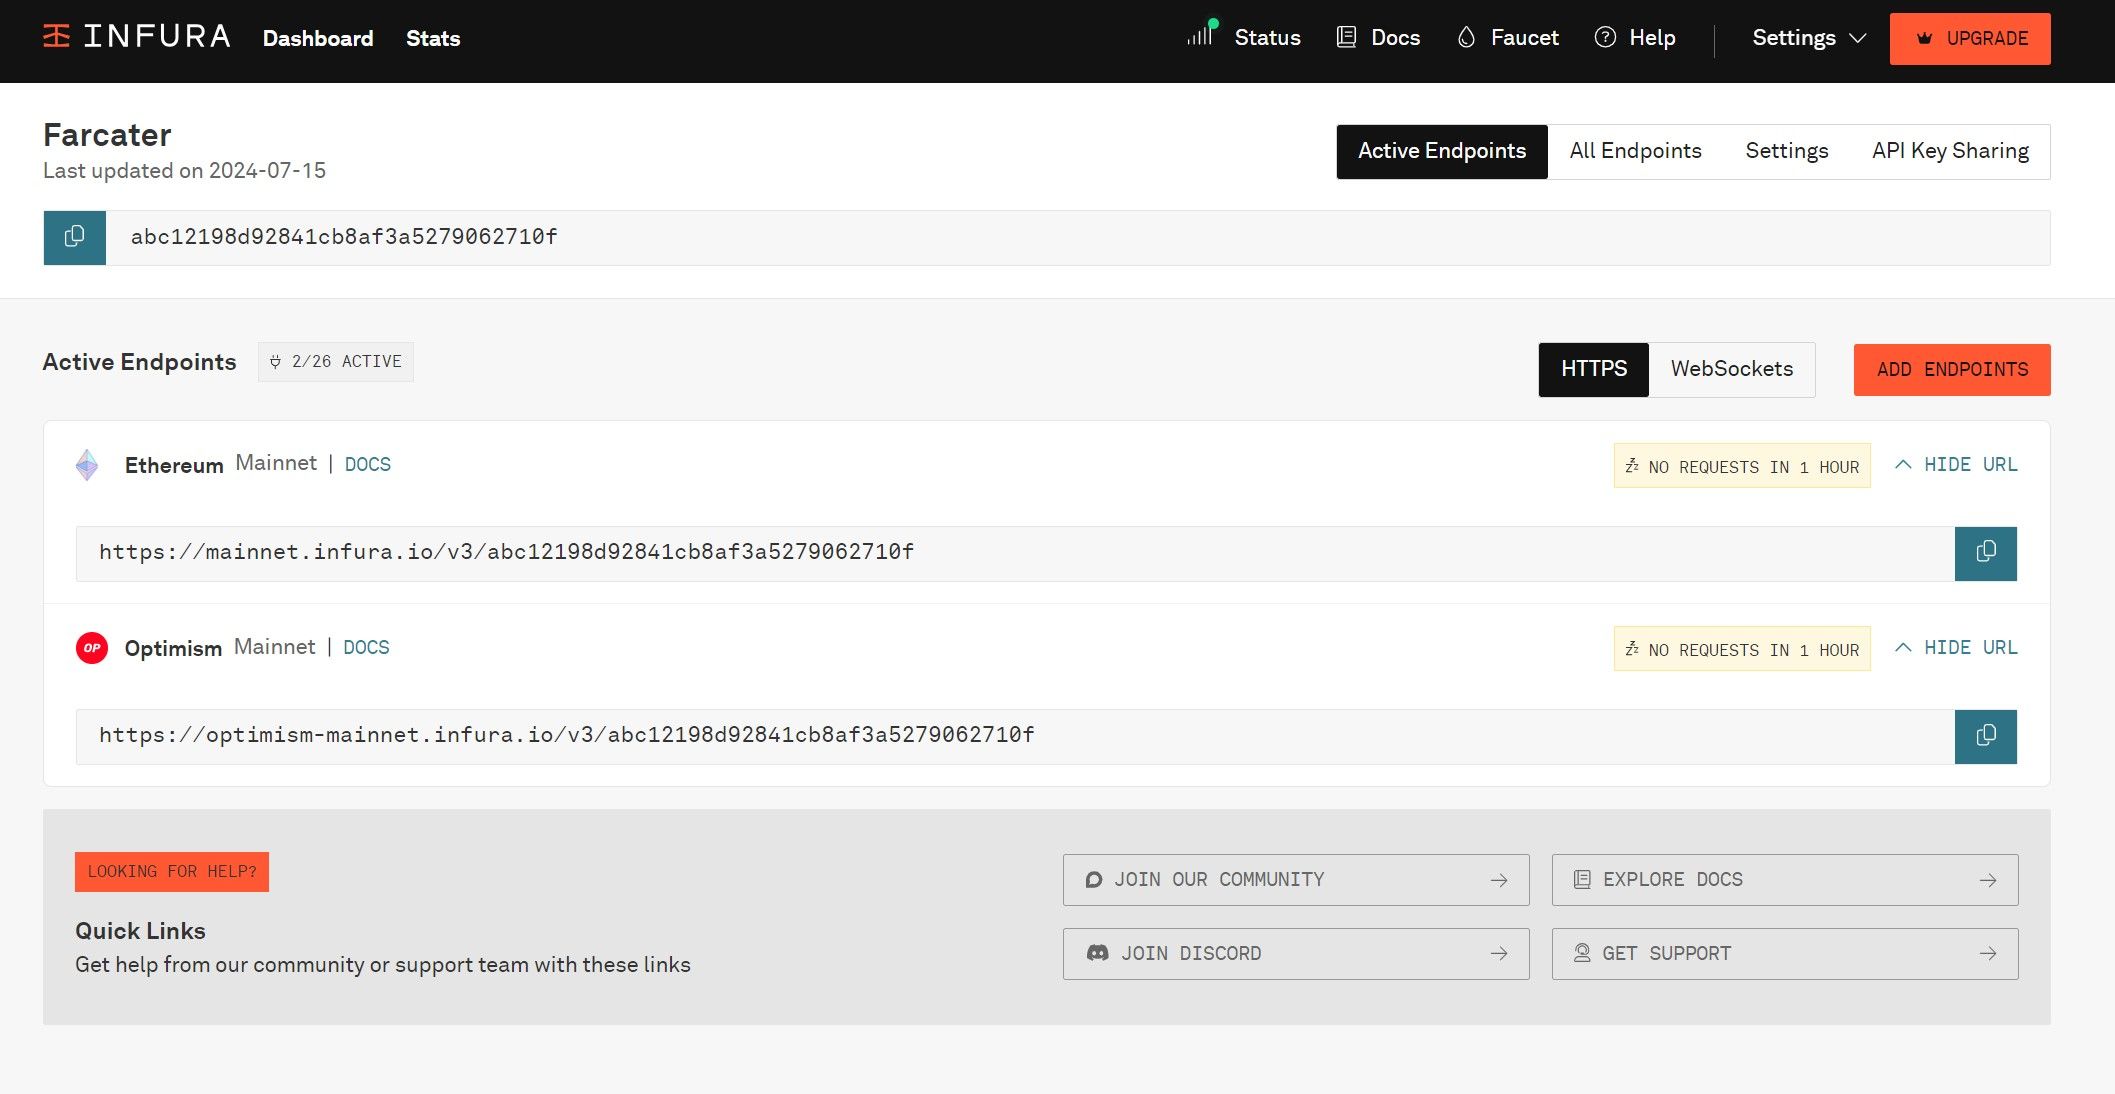
Creating API Keys
Our Farcaster Bubble will interact with the Ethereum and Optimism blockchains, so we need to create API keys for these networks.
You can do this as follows:
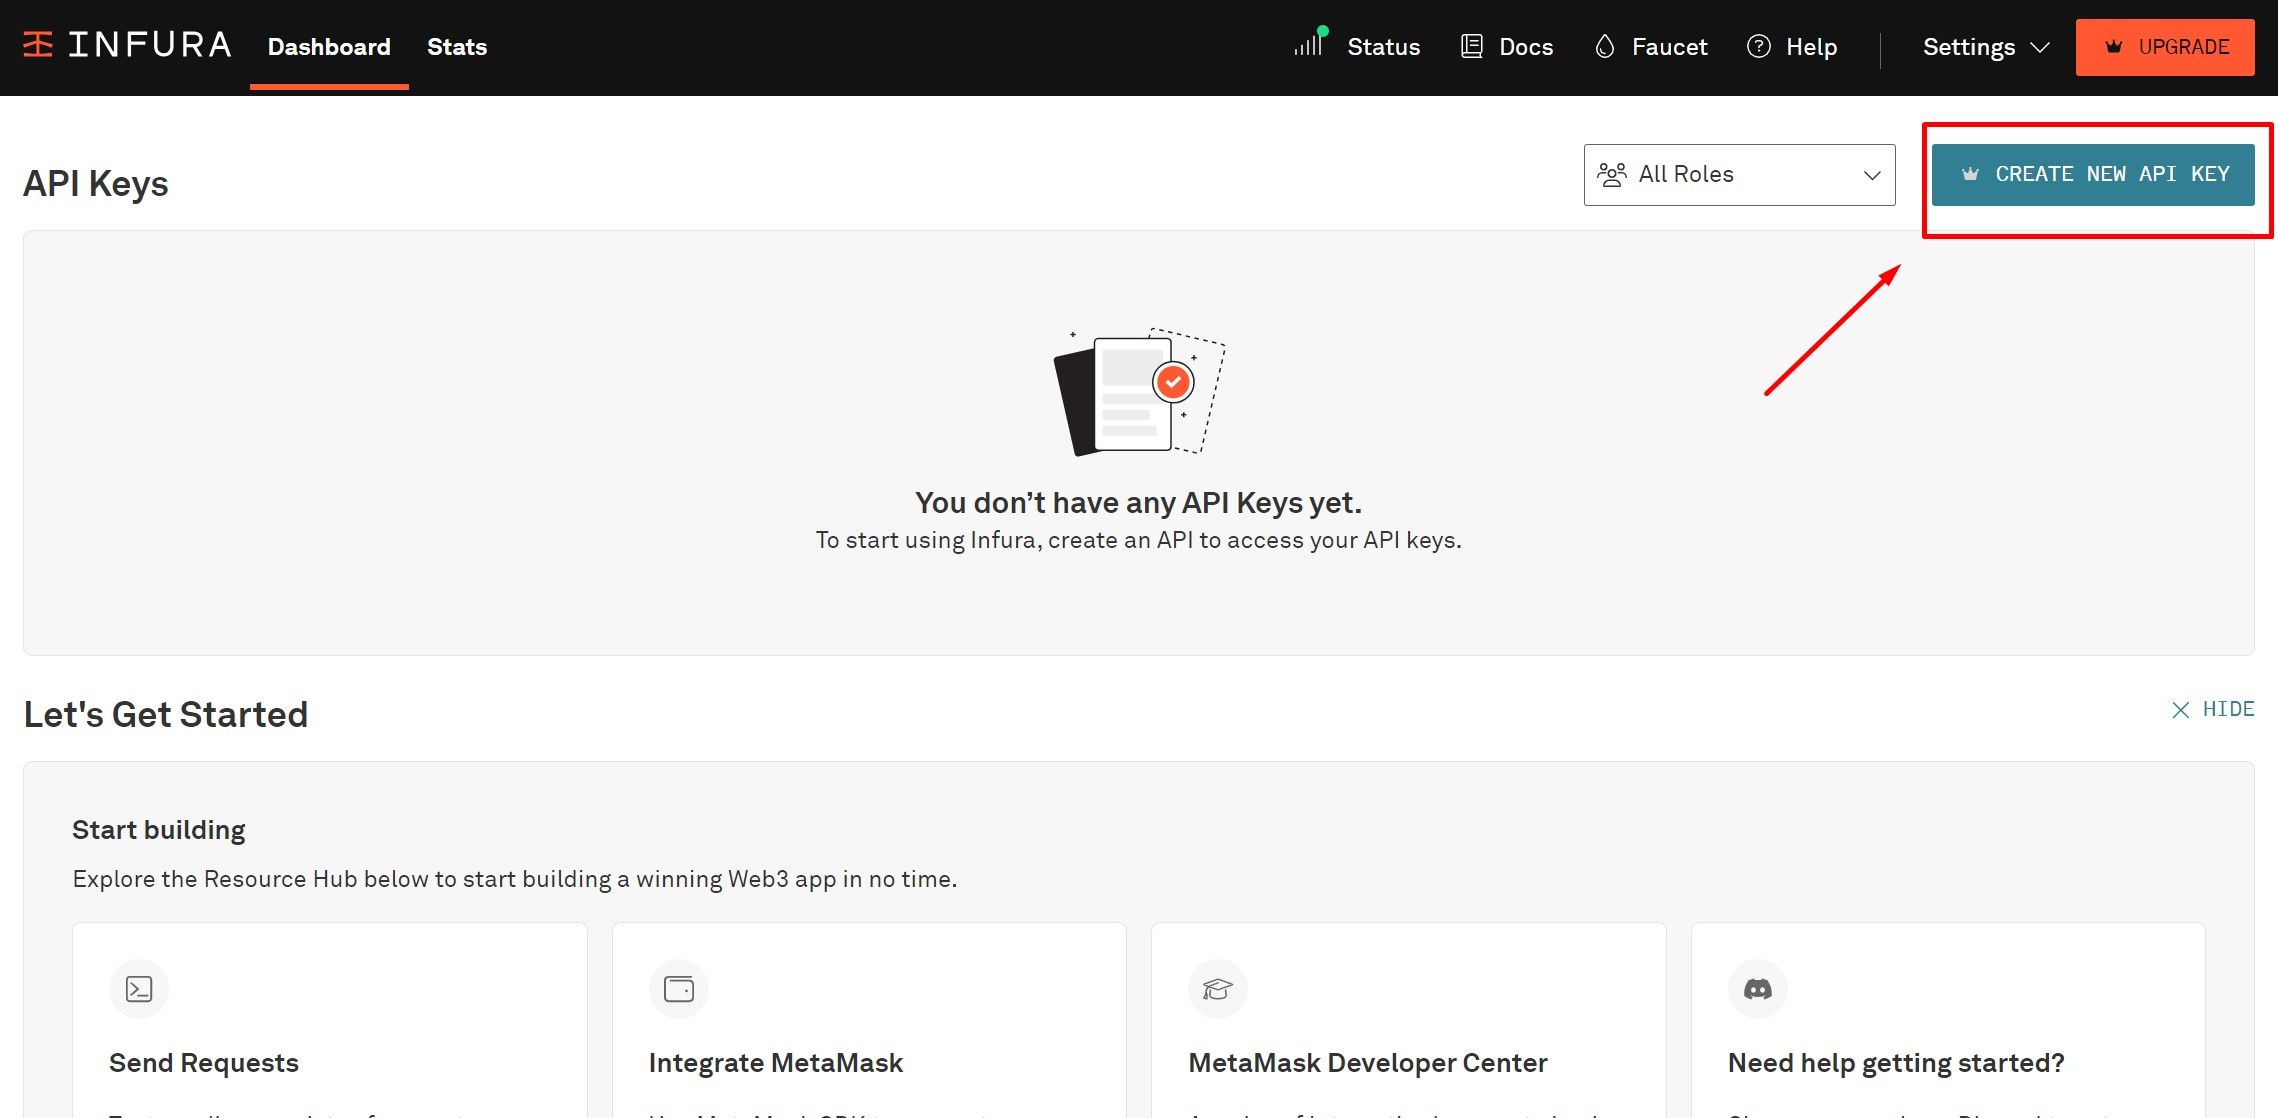
1. Go to the Infura website
2. Register an account
3. Click on "Create new API key"
Select the required networks (Ethereum and Optimism) and save the settings.
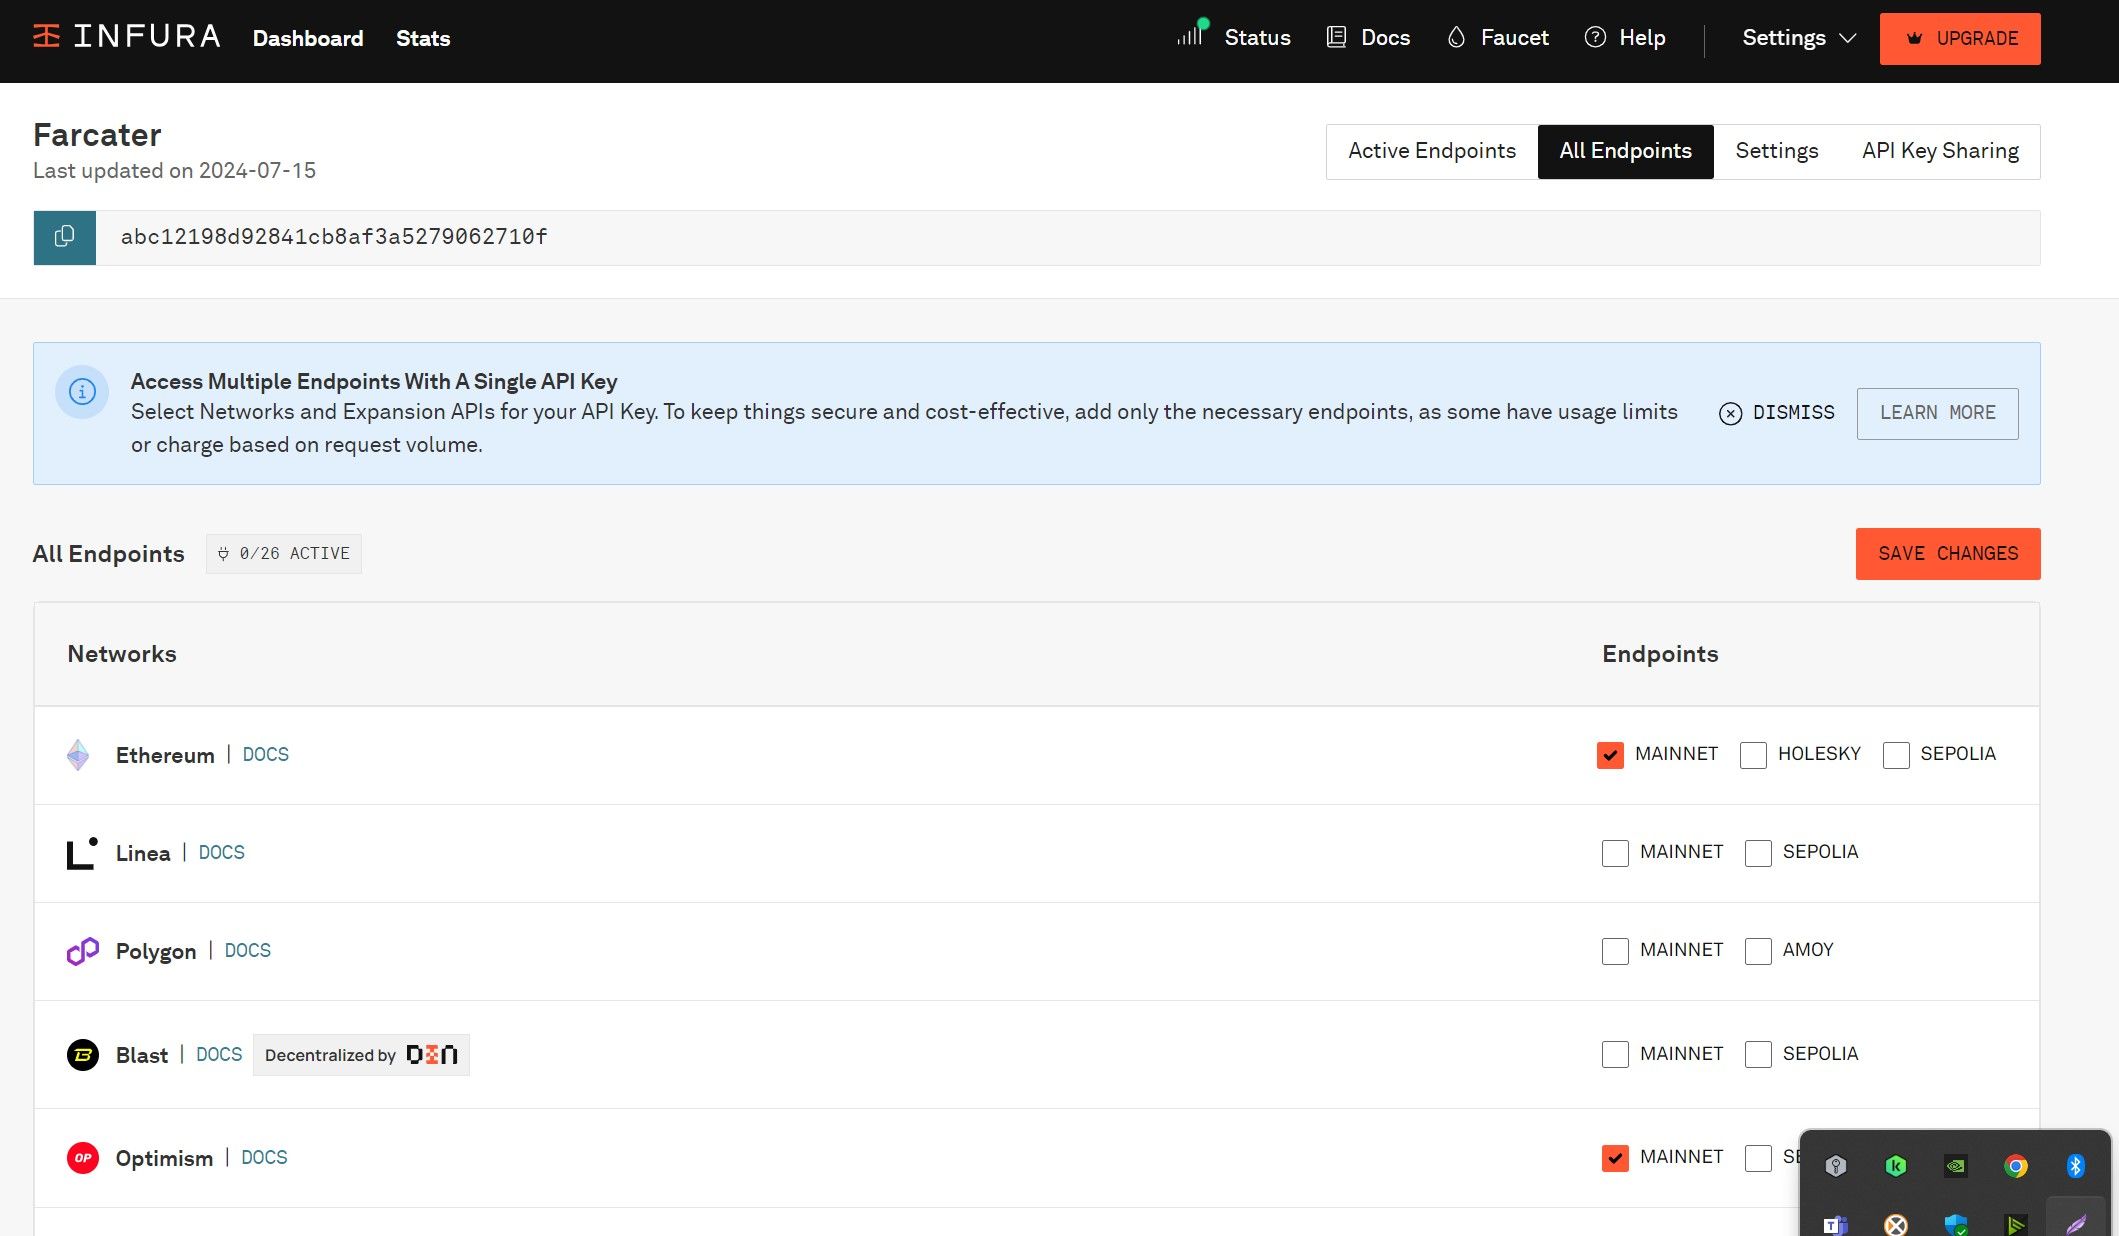
After that, go to the Active Endpoints tab, copy the API keys, and save them in a text file.
Launching Farcaster Bubble
Preparing the Server
Update the information about available packages and then install all available updates for the installed packages.
sudo apt update && sudo apt upgrade -ysudo apt-get install cronAfter installation, check that the cron service is running:
sudo systemctl start cronsudo systemctl enable cronInstall the "screen" package (allows you to run multiple terminal sessions in one window and switch between them).
sudo apt install screen -yInstall the "npm" package (for installing and managing libraries and tools needed for working with JavaScript).
sudo apt install npm -yReboot the server.
rebootCreate a new session named Hubble.
screen -S HubbleNode Installation
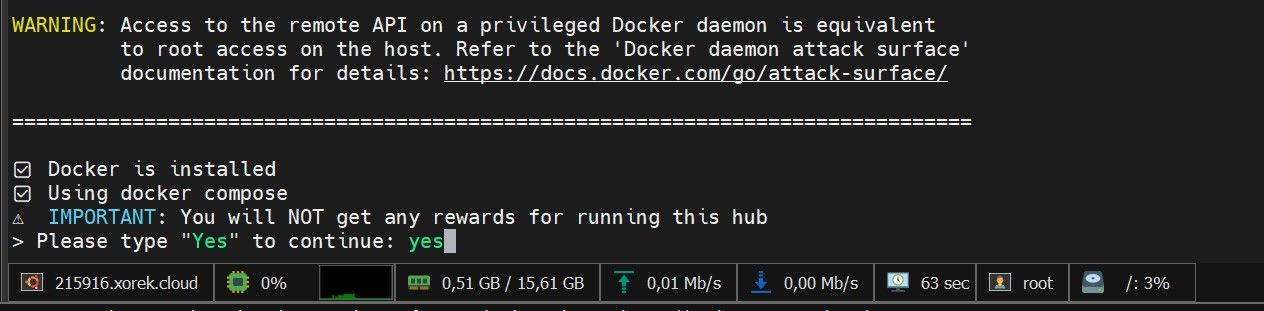
Run the installation script:
curl -sSL https://download.thehubble.xyz/bootstrap.sh | bashImportant: During the installation, the script will remind you that the node installation will not be rewarded. You need to agree and enter the word "yes."
Aptos Network also warned that it does not plan to distribute rewards to those who launched nodes in the test network. However, in the end, they still distributed $1,500 to everyone who filled out the validator form.
Wait for the script to complete and then enter the following configuration data in order (which we saved in the text file during the initial steps):
- URL RPC Ethereum Mainnet
- URL RPC OP Mainnet
- FID Farcaster


